
This card was stamped and embossed with black embossing powder, then
coloured with Inktense and Watercolour Pencils and a waterbrush. I added
a few metallic details using US Artquest Mica Metallic Watercolor Paint.
coloured with Inktense and Watercolour Pencils and a waterbrush. I added
a few metallic details using US Artquest Mica Metallic Watercolor Paint.
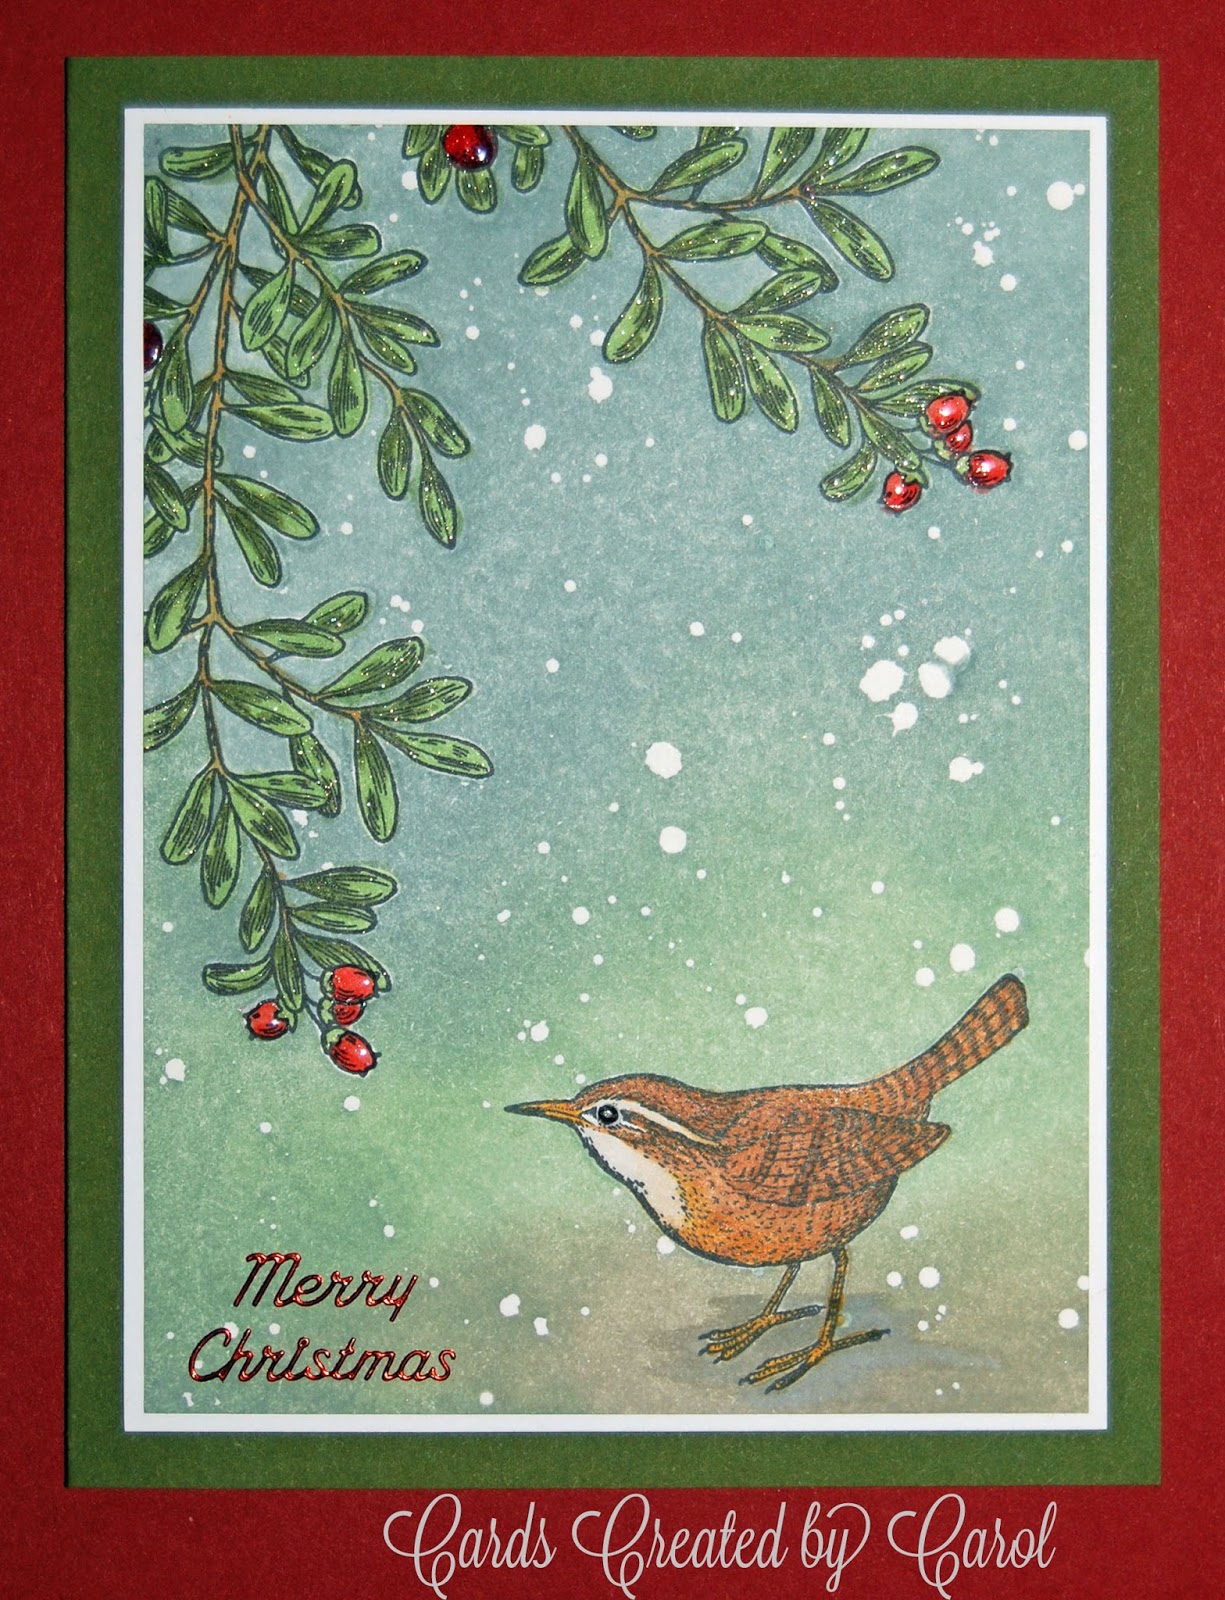
This card took quite a few steps to achieve the effect I was hoping to
accomplish. I first stamped the bird and branches with Jet Black Archival Ink.
Then I stamped, cut out and applied masks over the images. Next I
spattered the paper with liquid frisket. Once it had dried, I applied
Distress Inks using a mini blending tool. When I was happy with the
colour, I removed the frisket and the masks. I coloured the bird and
the branches with Copic markers and added a shadow under the bird.
Final touches included a Metallic Starform "Merry Christmas" greeting
and some Ranger Glossy Accents on the bird's eye and on the berries.


I had to show the inside of this lever card. It provided quite an unexpected
surprise when anyone opened it! I love the fact that this has very little bulk
for an interactive card. The little winter scene was stamped with Onyx
Black Versafine ink on pale blue cardstock and coloured with Prismacolor
Premier Pencil Crayons. I love this stamp set by Stampin' Up.
It has so many fun elements that can be used to create a scene.
The tiny cardinals, the car and the Christmas tree were fussy cut and
popped up with dimensional tape. I added a final touch by coating
all of the car windows with Glossy Accents.

Last, but not least, are a couple of detailed cards constructed from a variety
of die cuts and punched paper pieces. The tree base, candy canes, gifts,
and gingerbread men were cut using Impression Obsession's Bare
Christmas Tree set. I made a tree skirt from a small piece of red felt and
tied tiny bows for the parcels from string. The foliage for the tree was
cut using a Martha Stewart punch and layered to create a full tree.
The cat was also cut using an I.O. die and the window was cut using
the Memory Box Small Madison Window die. I added a winter scene
to be seen through the acetate window, which I printed on my printer.
The tiny mouse was freehand fussy cut. I added a tiny silver tail using thread.

This final card was constructed from the Impression Obsession Fireplace
set. I added a brick background to the interior of the fireplace
using patterned paper. The cats were cut from the I.O. Cat set and
coloured with Copic markers. The ovals for the picture over the
mantelpiece were cut using a Nellie Snellen set of dies. The
greeting was stamped and embossed with Ranger Regular Gold
embossing powder. I added some Diamond Stickles to the fire to
make it sparkle and some Stardust Stickles to the foliage on the garland.
Although it is difficult to see from the picture, this card has many
dimensional details and really was quite spectacular in person.
I hope you enjoyed seeing a few on my 2015 Christmas cards. I made about 40 cards this year, with very few duplicate designs. I thoroughly love making Christmas cards and hated to put away my Christmas collection of stamps and dies. I'm sure I'll have lots of new ideas by the time Christmas 2016 rolls around.
Best wishes for a happy, healthy and prosperous New Year!
